Wednesday, February 8, 2023

Freshly Made Sketches #572 and a Confession

I saw this week's Freshly Made Sketches challenge and immediately knew it called for big blossoms! I have so many floral and nature stamps that pretty much every sketch calls for flowers, truth be told. 

Stamps: Technique Tuesday

Greeting: Gina K

Embossing: Darice

Other: Copics and Stickles

It's hard to see the subtle glitter stickles. I have loved this product for as long as I have been doing paper crafting. The patterned paper is from Michael's (?) and was just laying there waiting to be used as a color palette. 

Confession: I have a love/hate relationship with Copic Markers. I've had mine for probably going on 13 or so years. I jumped on the bandwagon when it first hit the road. I took a class to get certified. I see all the stunning colored images and I just can't seem to be able to get the same results. I'm not patient or disciplined enough to do daily practice. So it isn't my go to way to color. I actually prefer to use solid stamps with colored ink, but I have a gob-ton of stamps that are to be colored in...because, hey, copic markers, right??? Today I wanted a subtle look to lighten my mood a bit. so I just decided to pull out a few markers and make it very light, follow the accent details of the image and just let it go and be happy enough with the outcome. And YES, my markers are 13+ years old and I haven't found one that has dried up yet.


Here's the sketch! 


Thursday, January 5, 2023

Throwback Thursday Challenge

 I recently joined a Facebook group called 'Share Handmade Kindness' which is a venture of Jennifer McGuire Ink . The first Thursday of the month they do a Throwback Thursday to a previously shared technique lesson. 

Today the challenge was to use embossing folders with an inking technique. 

I'm not much of a Valentines, hearts and flowers, etc person but wanted to have a few cards on hand just in case I needed something like this, even if not for Valentines Day. 

Embossing folder is Tapestry by Gina K Designs as are the sequins, cardstock and red velvet ink. 

Greeting is from Erin Lee Creative

Thanks for visiting!

Wednesday, January 4, 2023

Freshly Made Sketches #567

 Happy New Year!!!

Welcome to the first sketch of the year from Freshly Made Sketches. Number 567! 

I had a lot of fun with this one. As part of my craft room overhaul I got rid of a LOT of stamps that ceased to inspire me or felt off trend for right now. I took advantage of Gina K Designs massive end of the year sale and built my stash back a bit with some things that really spoke to my style. 

Last night Gina hosted a stamp and chat where she taught a technique using white colored pencil resist and ink blending. I immediately thought of this Queen Anne's Lace from the Whimsical Wildflowers set. 

It took a bit of time but it turned out as I'd hoped! 

Stamps, ink, cardstock and embossing folder Gina K Designs.

Also entering this in her monthly challenge that is to feature this technique.


Friday, December 16, 2022

Freshly Made Sketches # 566

Thanks for stopping by! 

I've been absent for a couple weeks with a minor surgery, four weeks of bronchitis and a major craft room overhaul.  I'm excited to be back in my updated space and seeing if how I THINK it should be organized and arranged actually works in practice. 

Here's my submission for the final Freshly Made Sketches challenge for 2022. I'm needing a stash of birthday cards badly so here it is: 

 
Inks and cardstock: Gina K
Image: Gina K Friendly Silouette
Butterflies colored in with Stardust by Sakura pen
Cuttlebug Embossing Folder
Die is ? 
 
Here's the sketch for reference. 
 
Merry Christmas and Happy New Year to all! 
Chris


Wednesday, December 14, 2022

Create.

It has been a little over a month since my last post. I've been in a bit of active limbo in the last month. I had some minor foot surgery in early November. Nothing that kept me completely down, just a bit of a nuisance as a means to a better end than what I've been dealing with lately. Thanksgiving brought a wonderful trip to Carolina Beach for family ThanksMas and bronchitis that still won't quite leave me. 

In the meantime,  I took on the project of a complete craft room overhaul. My craft room is in our 4th bedroom on the second floor with a challenging and limited floor plan due to having our attic access stairs for our 2nd floor HVAC.

For the last 20 years of paper crafting I've had several spaces I've used over the years: Basement with a card table. A windowless den. A spare room that doubled as a guest room and a clearance 8ft table. A 4-season room. Another basement adding some random tables. An office space off our family room. And now a dedicated room. 

In our last house we had a 4 season room with a large wall that the dressers, desks, hutches (pictured) from the hub's childhood bedroom set fit perfectly. I loved loved loved that room. It had 3 walls of windows that overlooked our backyard oasis and full of natural light. 

For a short time that furniture was used in an actual room in the current home until I moved the craft space from first, the basement, second, our den, and third, the 4th bedroom. 

 It worked well and I felt good about kind of up-cycling what we had that would work. Our first dining table from 1996 outlived it's use in the main part of our current house so it got put in the craft room several years back. 

I always longed for a different kind of space...you know, the kind of thing you see on Pinterest. 

Recently getting myself back into doing crafty things after a couple years of just trying to deal with life, I found I needed a few things to be different. I'm not one to just spend money willy-nilly. I kept looking at IKEA, and as much as I love it, I  just couldn't justify the expense for my craft space. I searched for DIY craft room furniture and came across the 9-cube shelf units with some kind of table top over them as a very cost effective way to get a lot of storage space on a limited budget. I set about planning.

I had a few goals. 

1. Counter height workspace. This was absolutely a must as I do a lot of my crafting standing up and my back was killing me working on surfaces that were sitting height. Getting older isn't for the timid.

2. Modular design so when we move again it's more flexible (and a LOT LIGHTER WEIGHT) than the current set up. 

3. Inexpensive

4. Matchy, matchy, with cute bins and other things to keep things tidy

5. My fun stuff visible instead of partially hiding in drawers.

6. A large work surface to facilitate multiple projects and stations for paper cutting, die cutting, working, etc. 

7. Easily organized and switchable to different projects than paper crafting. I also dabble in sewing, quilting, crocheting, and knitting. 

Well, me and my trusty graph paper, measuring tape, Walmart online, and Lowes online went to work. 

The basis of the design revolved around this bookshelf and the decision to get a 4'x8' piece of MDF for the work surface. This size surface was an aggressive goal for a room that measures roughly 11'x11' with an odd layout.

I decided that bookshelf was really functional so my furniture was going to be black instead of the white you see so much in craft spaces. I didn't want to buy another identical shelf just to have white instead of black. 

I acquired from Walmart's Mainstays brand the following: 

3 9-cube shelves, 2 3-shelf standard size bookcases, 1 6-cube shelf

From Lowe's:

4'x8' MDF board, primer, a palm sander, polyurethane, wall paint and appropriate brushes, etc to go with  black paint from the basement. 

I pared down a lot of my supplies, sold some things on eBay, tossed others, donated other things and began moving every thing out of the room. My daughter is away at college and her room was available for all the craft stuff. Our guest room was a holding spot for all the excess furniture.


Did I tell you I was recovering from foot surgery? And coughing up a lung several times a day?

I spent a day building all the Walmart furniture. I spent several days sanding, priming, painting, sealing the MDF table top. I picked a very pale grey-purple paint color called "Origami" and hubs knocked out getting the room painted for me in short order. Everything came together exactly how I'd envisioned it. 


To review what it was in the before:

I had to make a couple quick cards yesterday so it was the first time actually working in the space and WOW...I did good. ;-)

I have a friend making me some vinyl letters for the wall that simply says: CREATE. 

Thanks for coming along on the journey. 


Friday, November 11, 2022

Freshly Made Sketches #561

Eleventh Hour. Of the Eleventh Day. Of the Eleventh Month. Happy Veteran's Day. 


I'm recovering from some minor foot surgery and have had plenty of time to surf and see others making beautiful poppy cards. I wanted to do one too! Also, as I was having some trouble sleeping last night I kept mulling over this week's sketch from Freshly Made Sketches and coming up a bit empty of ideas. 

Working in short sessions, I decided to just do the poppy, then managed to get it to fit the sketch. 

I glued crumpled tissue paper to white card stock and let it dry. Then I die cut the poppy from a set from Concord & 9th, colored with Copic markers, and finished with some light brushing of pearl ex powders. 

The inks, two background elements and greeting are from Gina K. It was hard to get a good picture of the texture the tissue, markers and pearl ex gave to the poppies with the gray #3 skies today, so it's a little bright.

Have a lovely day! 


Monday, November 7, 2022

Instagram inspiration to the rescue

 I have this beautiful eucalyptus paper and so do hundreds (or more) card makers. I don't know what it is, but it is just so pretty. That said, it's a very bold and busy pattern and I was having a hard time coming up with a good balance. 

I saw a card on Instagram by Mary Fish, @ stampinpretty and saved it to my favorites. I needed a card for a friend who had some procedures done, so I used her inspiration to get going. Then I made 3 more with the bits left with different greetings to put in my stash.


Paper from Hobby Lobby

Stamps Technique Tuesday

Die Momenta

Cardstock Gina K

Friday, November 4, 2022

Freshly Made Sketches 560

Here's this week's installment from Freshly Made Sketches

I'm trying to build back my stash of need-right-away cards. So I started with the theme in my mind of having a square wedding card. I really like the idea of splitting a large image apart that I've seen all over. I really like a bit bigger canvas for these larger images. More white space. Since I'm trying to get back to finding my style/groove again, I reflected on what hooked me to this craft more than 20 years ago. Heat embossing. Here you go! 


Stamps are from Concord & 9th, Technique Tuesday (sentiment).
Gold and white card stock. 

And here's the original sketch. 


On a more reflective note...
I've boxed up the majority of my stamp sets, a full set of ink pads, inks, gobs of random card stock and a mountain of other supplies. Wow. I can't tell you how good that feels. I don't know what to do with it all but it is freeing to simplify a bit. After 20 years some things just aren't feeling modern enough and I want to get some new things. I've completed my mini ink collection and matching card stock from Gina K Designs and that has really helped me get more focused. I like the matchy-matchy. My taste has surely changed and I'm continuing to find my place in all this again. If you got this far, thanks for looking. Have a great weekend! 


Monday, October 31, 2022

Faux Marbling

Two posts in the same day! 

I came across the faux marble technique somewhere in my web travels. I can't remember where to give credit! It's easy enough..just some tissue paper, crumpled up bounced on an ink pad in two complementary colors. Then to get the darker striations use a marker along torn paper to make random designs. 

I recently got a bunch of new embossing folders and pulled out some old ones. I really love texture in white space. I cut apart the 1/4 sheet of faux marble and just kept playing around. 

I have a plan for the birthday one, but opted out of a greeting on the first. Sometimes you just need a greeting-less option. 

Sentiments are from Technique Tuesday, folders are Park Lane, Tim Holtz, and Cuttlebug, card stock from Gina K, and dies are Spellbinders. 


Freshly Made Sketches #559

 Very quick card for this sketch challenge getting it done shortly before the deadline at Freshly Made Sketches


I've had this paper from Hobby Lobby for some time and have never made anything with it. Sound familiar?  It is casually known in a group I'm in as 'that paper'. It's just so pretty! I wanted to be careful not to make it too busy and I had several things laying on my desk that just worked to whip this up in a short period I had to play today. 

Paper: Eucalyptus
Embossing folder: Park Lane from Joann's
Sentiment: Technique Tuesday
Die: Spellbinders


Thursday, October 20, 2022

Freshly Made Sketches #558


Here we go.....for the first time in a long time, a blog post featuring a card! 

When you're in a creative slump, which I have been for some time, sketches are a tool that can help. A LOT! This took me a bit to get to what I felt was right and I almost gave up frustrated. Four or five versions later and much use of the round bin, and I channeled Farmer Zuckerman from Charlotte's Web: 'That'll do <Chris>. That'll do." 

Video tutorials are also fun to get the creativity going. Yesterday I watched a video from Gina K Designs on the Retiform technique. I applied it in my own way to stick with the sketch for this week from Freshly Made Sketches. In order to enter the challenge officially you have to link your blog post to the challenge blog. So, welcome to anyone who might be checking this out! Feel free to get to know me and where I am right now from my post earlier today. 

Stamps: Stampin' Up! c. 1997

Embossing folder (used the debossed side)

Inks and Cardstock: Gina K Designs


Eight years later. Eight.

 "Time flies over us, but leaves its shadow behind." -Nathaniel Hawthorne

In 2014, I wanted to revive this blog as a place to share whatever it was I felt like sharing. I have long wanted to get back in the groove of creating and using all the stuff I've accumulated over the years in the arts and crafts realm. I get going for a bit, then it all sits. Months sometimes pass before I step foot in this space. Often, the scraps of the last project from months ago greet me to be put back in their places. I've toyed with boxing everything up and finding somewhere to donate everything so I don't feel like it's being wasted. I've struggled to find purpose in creating just for the sake of occupying my hands and mind. I mean, shouldn't I DO something with the things I create? Where does my style fit in? What IS my style? Can I even create something that isn't guided by a sketch or video? Shouldn't I make money? Do people still want handmade things? What's going to happen to all this stuff when I leave this world? 

Paper and ink have always been the places I go back to, where I feel at my crafty best, the place that has fed me creatively for over 20 years. While I had periods where I would get back into the groove, I've dabbled in other things. After my grandmother passed in 2015 Time and Trees I made a quilt to focus my mind on something besides how much I missed her. She was who I would send random cards to the last several years of her life, just to connect and make her day. I've art journaled, painted, continued to do an annual digital family album, taught myself to crochet, sewn a few things, and now trying to knit. I even made an Instagram account dedicated to paper things. (User: papergirl1974) I've bought new things in an attempt at finding some inspiration, only to get minimal joy or use out of those new things. 

In our household, we are approaching 12 years almost to the day of moving here. I have a dedicated room for all my stuff vs the basement or den downstairs. We graduated our daughter from high school and will soon graduate her from college. I didn't go back to work after the nest emptied. Too much time had passed that kept me out of the real world and I simply didn't want or need the stress in my life that workplaces often bring. We bought an RV a couple years ago and it has become my happy place. 

We've endured a global pandemic and all the challenges and change in life that has brought, and I can honestly say that during 2020-2021 when spreading joy through cards and other things was likely needed and welcomed, I was in no head space to do so. 

I have all the time in the world, yet I've fizzled hours of the days scrolling meaningless stuff that neither fed me nor inspired me. (Quite the opposite, actually. ) Social media is a chasm of comparison and illusions of perfection that don't exist in the real world, yet we are sucked into believing it all. Comparison truly is the thief of joy. 

So here I am back in my own digital and physical space where I can hopefully find a shadow of the joy I used to derive from spending hours just playing, learning, and engaging with the creative community in whatever way happens. 

Thanks for coming along. 


Wednesday, February 25, 2015

Trash Day


I'm sitting here on yet another cold February day listening to the squeak of the brakes of the recycling truck. Later, the trash man will come with his loud music piercing the crisp air..by the trash man I mean the driver of the trash truck with the automatic arms that empties the non recyclables. I've been saving this picture for a couple weeks and the inspiration and thoughts finally came together today..
   Recently, the Mr. helped me focus on some household tasks that needed taking care of...particularly the Goodwill donation pile and the dump run.
   One Saturday this month, we loaded the truck with stuff that just needed to go...disintegrating patio furniture, some chairs that just spent too much time in the pool house in Indiana and kept growing mold, extra items that are either worn out or broken, but can’t just keep around anymore. We try to find homes for things we wish to discard, but sometimes things just have to go. We're all familiar with the drill.
   As we made the short trip to the county dump, where we can dump all we want for free, I recalled going along to the dump in Ohio with Grandpa Buster as a very young child. Any field trip with Grandpa was special so when asked, I went. And it didn't matter where. ( I particularly liked the trips to the 'pretzel guy' then 'Angie's Diner', but that's for another day...)
    It’s a image that stuck with me...I remember the smell hitting you when you approached the dump and it was a sea of trash as far as I could see. Not just ‘large item’ discards like this, but trash, actual kitchen type waste. The sound of backhoes and bobcats bobbed along the pile moving things around, for what reason, I didn't know.  Grandpa, and others, just backed their trucks up to the pile. Then they just tossed the stuff out of the truck drove away. Every time I take the trash bins and recycling out to the curb I think of this experience and figuratively throw my hands up in surrender, because what do you do?
   Like everything else, we’ve been softened by clever marketing to the reality of what we are doing....my experience as a child is a sharp contrast to what I saw this day. We drove up the winding, somewhat manicured hillside to a pattern of construction size dumpsters that almost looked like a neighborhood street, none were overflowing, labeled with categories and/or numbers. The attendant politely directed us to number 10 after assessing the items in the truck. We pulled up, waited our turn, politely said good morning to our fellow dumpers, as if we were having morning coffee greetings at the mailbox. We took out turn, emptied our items, and drove away.
   Just as our taking the bins to the curb separates us from the reality of the mountain of waste we create, the rather pristine conditions of our county dump takes the sting out of tossing aside items we had to have at one point but no longer want. I kept looking for the sea of trash I remembered as a child but it was not visible. There was no foul smell, I thank February for that, and as we got ready to leave I grabbed my camera to preserve the images of this new way of going to the dump. The impact of this experience likely doesn't stick with many people because it ISN'T impactful. It's just life now and we are conditioned to put it all out of our mind once a week when the bin is rolled to the curb and every so often when we toss things into rather clean bins at the dump.
   I will point out that making the dump more appealing to the general population probably serves the adjunct purpose of encouraging people to keep their properties more tidy. If it's a negative experience, people don't want to go, so, particularly large items, would clutter yards and sheds. (Some people still must not realize the dump is so nice!!!)
  I'm glad, through tagging along on a routine errand with my Grandpa, I have that image in my memory and I can share it with my daughter sometime. She was writing an essay recently when applying to a summer science program. One of the questions she was asked was to name something you want to know more about. She came up with pollution...ie, what happens to all that trash we create? Perhaps we need to take her to the dump and satisfy a little curiosity about the step just beyond the curb, pairing Science with History a bit.

Wednesday, January 28, 2015

GATHER Story Kit from Ali Edwards

I subscribed to Ali Edwards Story Kit 'Gatherings' this month. It's a series she does monthly with lots of great thought provoking prompts and digital elements to add to your collection and help tell your stories in your scrapbooks. There are also physical product options if you are a more traditional (non digital) or hybrid (combination of digital and traditional) scrapbooker.

Each month I'm doing an 8.5x11 spread to touch on the theme, then plan to add each month's theme to my overall approach to our annual album. This allows me to use more of the fun elements in the kit as they pertain to what happens in our lives as the year goes on.

The approach to my Project Life format album this year is more monthly in nature than weekly. I'm also taking themes of my word of the year, (Balance) and the Story Kit themes and carrying them through as jumping off points to storytelling.

Shown here is my page 2 of the spread. Part of the exercise today was seeing what in my life is gathered...people, things, etc. As I looked around I confirmed what I always knew about myself: I categorize and gather like items together. Frequently. Obsessively at times.

This memory keeping, scrapbooking, writing, storytelling thing is a big part of my routine. It's pretty important to me and I think my family enjoys the end result. It also takes a lot of gathering of...stuff...thankfully I've got a bigger hard drive than I do physical space to collect the fun things that give me inspiration.

Check out the links for ways to put together the stories and photos.


Thursday, January 15, 2015

Sunlight

Give light, and the darkness will disappear of itself. -Desiderius Erasmus

Tuesday, January 13, 2015

New Year!

Welcome to 2015.

Have a few things to share with you!

December album was a success! I took off on the idea to put all our Christmas cards in a ring album and built some story telling of the month around it. Got it completed yesterday! I'm thrilled with how it turned out and most importantly it helped rekindle my enjoyment of taking pictures and gave me my functional Photoshop refresher I needed to hit the ground running with our annual album in the style of Project Life.

Towards the middle of the month Ali Edwards launched monthly Story Kits in Digital format. This is a monthly themed class with guidance on the theme and several elements to help you put together pages or an album, whatever you wish, to get more variety and focus in our story telling. I love writing, her approach, and the prompts to help flesh out the thoughts I have based on the themes. These kits are also available in physical products, and they are beautiful as well! Digital just seems easier for me.

I plan to not just document the everyday as I've become accustomed, but also keep the monthly themes going throughout the rest of the year now that they are somewhat top of mind. Each month I'll do an introduction page or two+ with words and photos, then revisit the theme as the year goes on. For example, 'Firsts' was the theme for December 15-January 14. Going forward, as a relevant 'first' comes to mind or occurs, I'll use the digital elements, photos, words tell the story and relate it back to the original theme. I'm hoping this, and keeping my word of the year, 'balance', more present through words and photos will break up the monotony I was finding in recent years with this album.

Here's a little glimpse into the first couple pages of the annual album. I'm not much for sharing too many of our personal family moments and photos on a public blog but if a neutral page comes up or I can block out personal info as the year goes on, I'll certainly do so. I think it's helpful for people new to this whole thing to see how it comes together.
I've chosen some kits from both Becky Higgins and templates and elements from Cathy Zielske which are more earthtone in color. I'm also employing the lots of whitespace philosophy. It saves time and looks more clean. I tend to be all colorful in the beginning of the year and more plain as it goes on. I'm not too worried about matchy match this year....just whatever strikes me at the time.
Questions?
Post to comments.
C.

Friday, December 12, 2014

Looking for that one picture....

Several weeks ago my daughter put in a request on behalf of the middle school for her Kindergarten photo and I've kept moving the task down the to do list because I knew it wasn't just going to be a two-second job. It would snowball into something. She's in 8th Grade and it's for the yearbook. I can't imagine being the individual responsible for acquiring these for every student AND putting the target deadline for Winter  Christmas Break. I'd love to see her inbox...

To put this in perspective, Kindergarten for us was 2006, right there between film cameras being stuffed in the back of the drawer and the complete acceptance of digital photography. Social media sharing also exploded around this time. Through this, the annual fall school picture day has still yielded an envelope of pictures that family loves to receive and display in their homes for years to come. Despite carefully posed selfies with clever filters that adorn Facebook, Instagram, Twitter, and (insert 500 photo sharing sites here), the school picture is the annual avatar on the timeline of our kids' maturation.

I've never been the milk and cookies after school, June Cleaver type mom and I don't do a lot of the mom stuff in the traditional way, but I have done a pretty decent job at keeping pictures organized throughout my adult life.

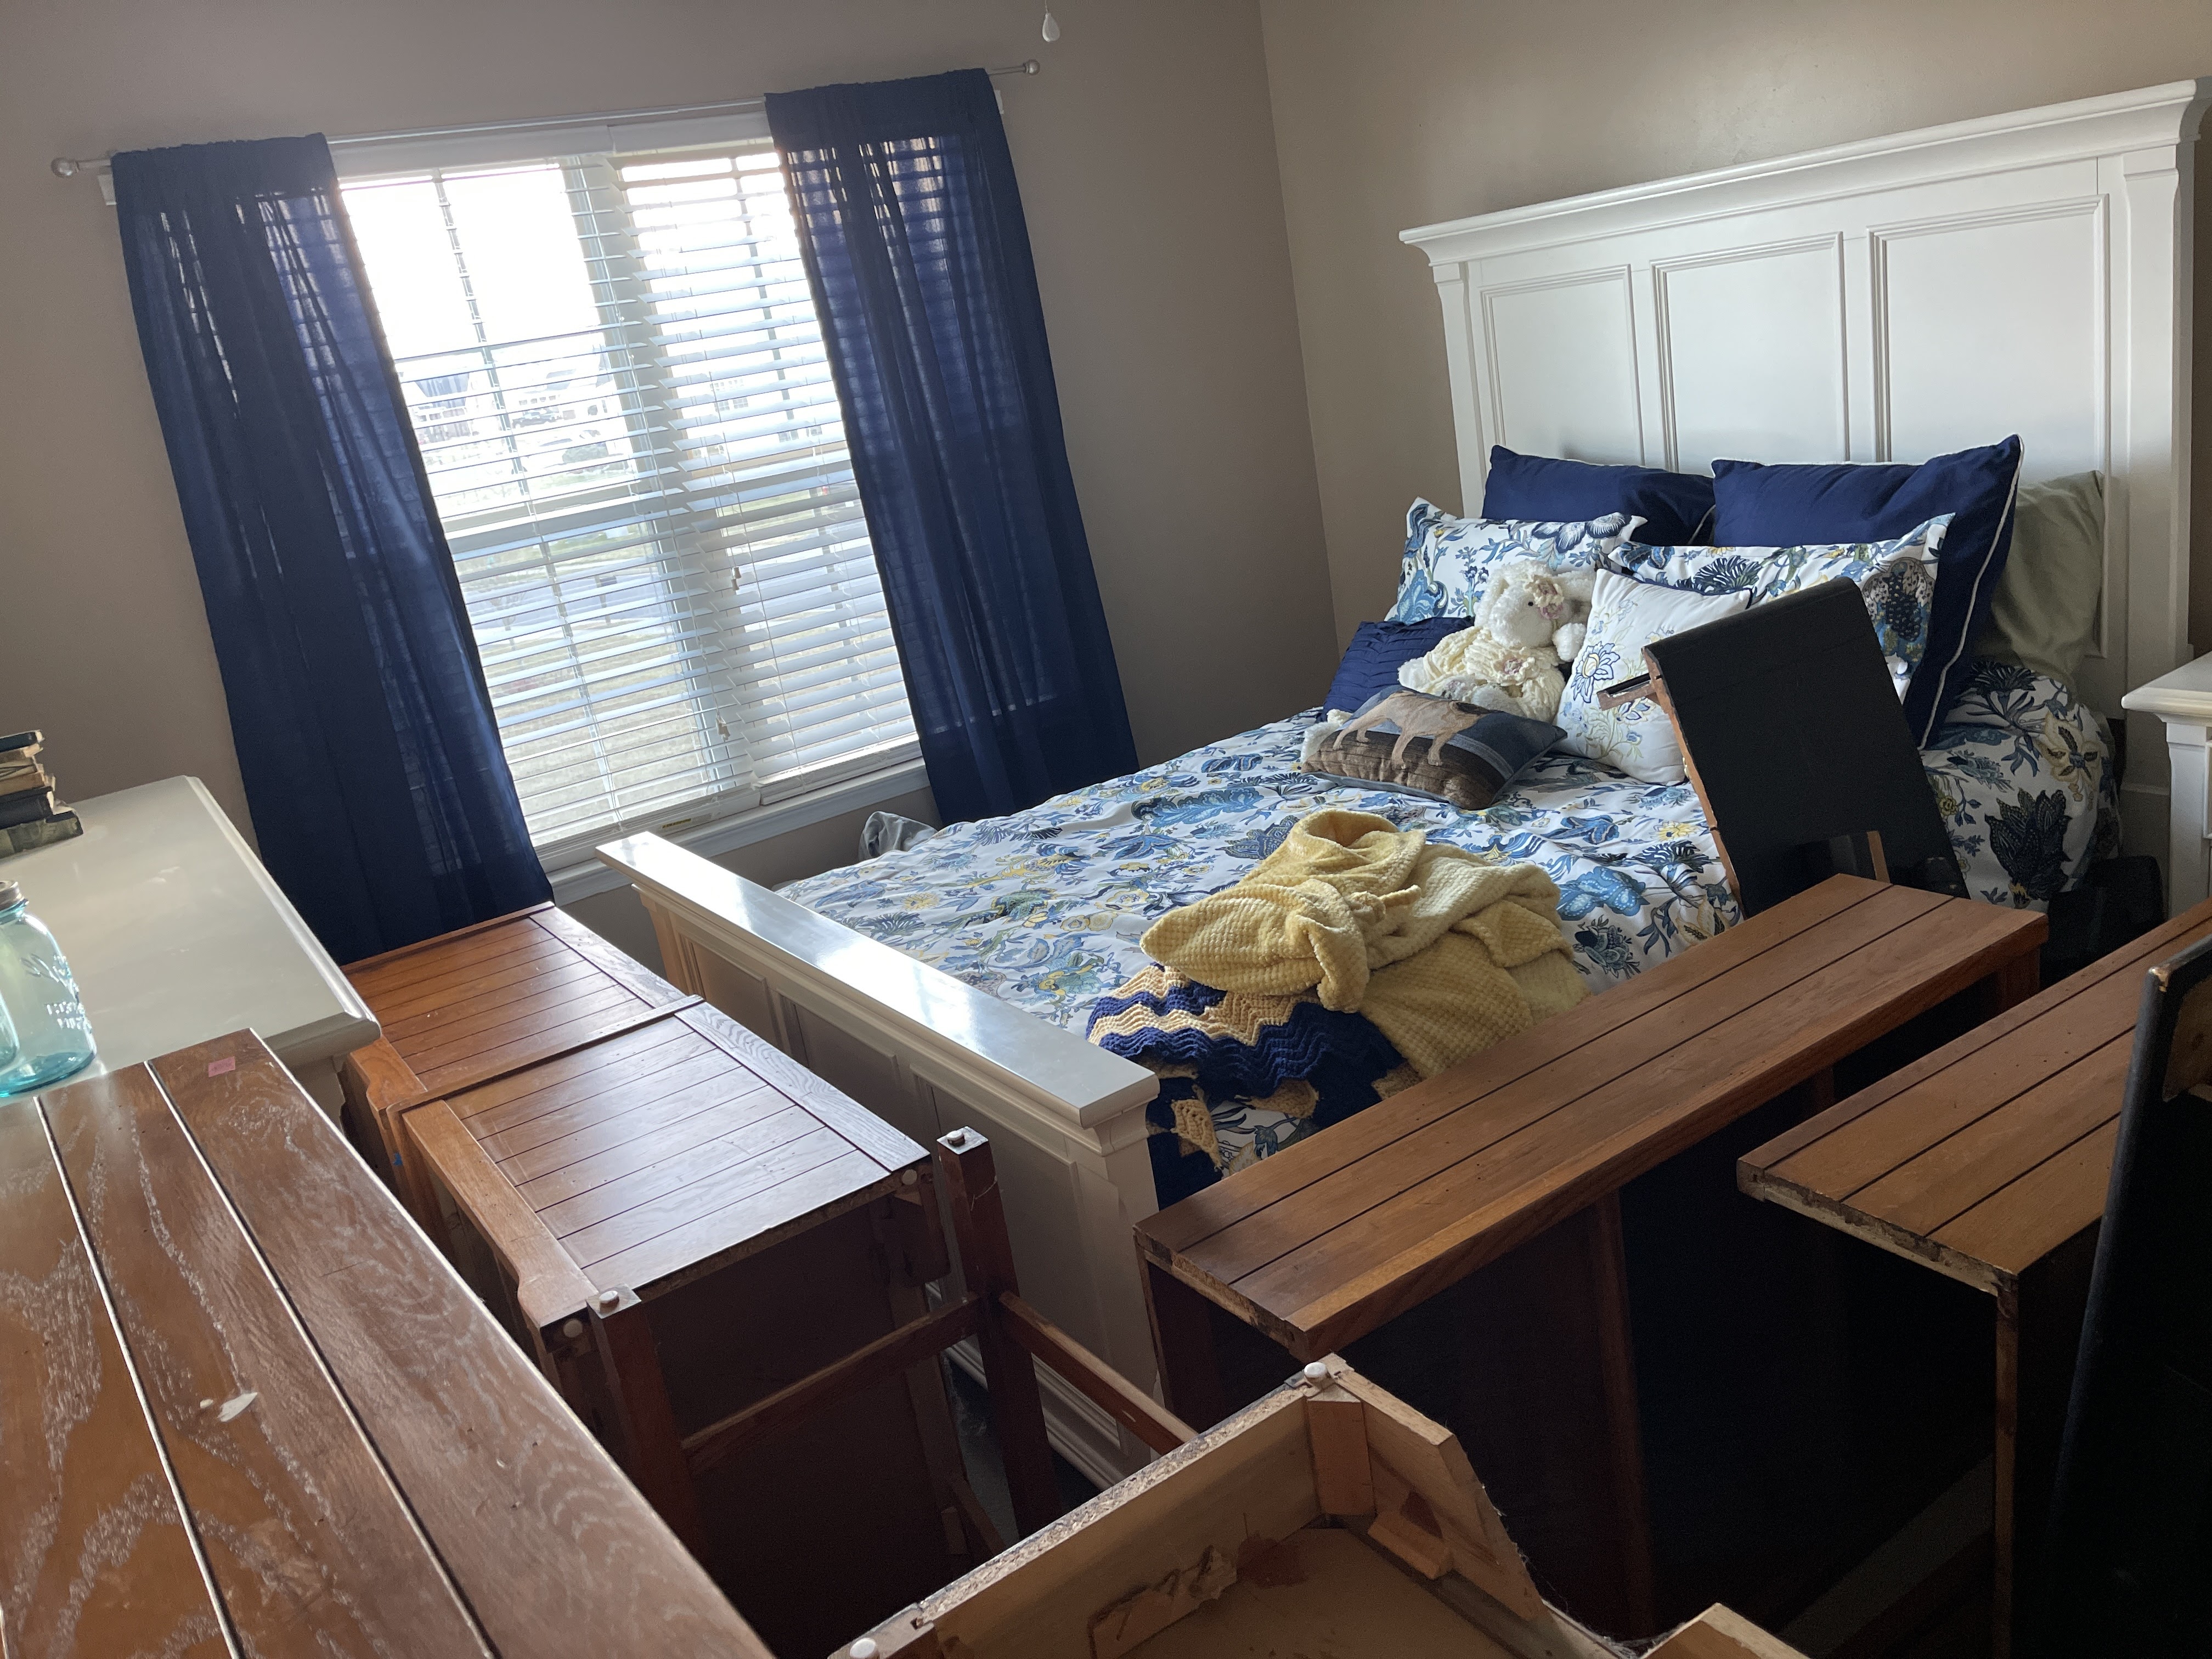
I've shared my photo organization method with people over the years and it seems like a good thing to share here. While the above picture seems like chaos, it really wasn't. It was just one final organization step I had not completed yet in the overall system I use to keep pictures organized. It took me about half an hour to actually locate the photo I needed, and another hour or two to finish organizing this part of our photo archive.

The tips below are for the everyday folks trying to manage the day to day pictures. I'm not a professional....I'm sure they've all got a better system. One big suggestion as you embark on this process... when you are reminded of the story of the photos you see, jot it down on a piece of paper. Even if you aren't a scrapbooker, others seeing the photos later will enjoy the story if it's filed along with the photos. For digital photos, most photo management software allows for captions or notes or something.

Digital photography:
I'm a scrapbooker and the first thing I learned years ago was start with today and stay current going forward, then catch up the past when you have time. Get your workflow down that works for you. Then apply it going backward, most recent first.

Start the new year off right and set up a folder in your picture section on your computer or the cloud of your choice for 2015, make folders for each month. That's where you will start January 1, 2015 regularly transferring pictures from your phone, camera, etc. I do this on average, once a week from my phone.

I use Dropbox as the in between, then transfer to iPhoto after scrapbooking, editing, deleting the duds, etc for permanent backup. My DSLR has a wifi feature and they get automatically dumped into my computer when I'm home, but the same process applies if you transfer off your camera via USB.  Dates are embedded in the meta data (right click, properties) so there's no need to make weekly folders or daily etc...unless you are highly OCD, which I am, and I do, but it's more for my scrapbook workflow than overall preservation. By year, by month. Simple. Some photo organization programs use tags and facial recognition...if this helps you, go for it. I don't take more time to do that, plus I only have one child so it just became an unnecessary step for me.

This is the system I have used for digital pictures since digital started. The same structure is on my computer, my onsite backup drive, and the backup drive that I recently sent with my parents to put in their fireproof safe. If you don't have your digital pictures on a backup drive, please please do this. Been there, done that with a crashed hard drive and days of waiting to see if that last picture of me with my grandpa can be recovered. It sucks. I think this event was when I got as serious about digital photo organization as I had been my film photos.

The blessing of this effort: If I want to see my daughter's 6th birthday cake...I can find it in about 5 minutes. You'll thank yourself for this effort when it comes time to get that high school graduation slide show ready. Your descendants will thank you as well.

If you have a 10+ year mess of digital pictures on your computer (or phone, multiple cameras, multiple SD cards, CDs, etc) this is going to take some time so break it down into workable parts. Set up the years and months folders. Start dragging pictures and folders into them here and there. Then dig in year by year, month by month while you're sitting there watching TV, bored at the next family gathering, having coffee or a glass of wine while waiting for the kids at practice, etc. Don't forget to back up.

Pre Digital:
I developed the computer system I use from how I organized all my film camera pictures prior to digital after my daughter was born. Everything is sorted by year, then month and/or major event. If you can't break old pictures down by month, then do the best you can to get them by year or event, or decade if you have to.  It isn't always easy to remember. My sister and I started this process with my mom several years ago and it was challenging so use other people to help if you can. It's really quite fun! We need to finish the job with her sometime and I'd venture a guess that the same thing needs to happen on my husband's side of the family.
Gather film photos in a central location over the next few months. Feel free to throw out duplicates, dud pictures that are especially common with film photography. It's ok. Really. You don't need 25 blurry pictures of Aunt Ethel...one or two are fine.
Get some photo boxes. Michaels, Walmart, Target, etc have them. The beauty of digital photography....I only have 4 big photo storage boxes on the basement shelf for my entire life...up to the mid 2000s.
Get index card dividers that you can label or just cut paper, card stock, or use envelopes to label with the years, months.
Dig in, make piles, write on the back of pictures, sort sort sort. Then file.

Professional family pictures, school pictures of your kids, your other kids in the family, etc:
The size and number of these made it inconvenient to store in the photo boxes, which is why I had the huge piles yesterday that were only partially organized. I use envelopes divided by year, child, grade.
My nieces and nephews school pictures go in envelopes...one envelope for my side, one envelope for my husband's side. It's their parents' job to organize those! haha!
When I started doing an annual album in the Project Life method these pictures became part of the album and are put in either digitally or placed in the large envelope stored in the album where I put greeting cards, etc.
Our cousins and their kids pictures are similarly divided...they all go in one envelope by family.

What about all that artwork the kids brought home through early elementary school?
Save a few favorites, take digital photos of the rest, and toss it. Then make a photo book on any number of photo sites out there or make it part of your annual album. I know when we moved this last time I got rid of so much of the artwork, but I photographed it for this purpose. Somewhere in the 2011 photo files are the pictures because that's the winter after we moved and when I did the big purge of all that stuff that was hiding in our closets for 8 years.

The job may seem overwhelming so take your time. Set a goal of a year or so to get it under control, while keeping the current year organized. It really is worth it to have this part of your life somewhat organized. Hope these tips have given some direction to the job. You don't have to scrapbook anything, just keep it organized. Post any questions in the comments.


Thursday, December 4, 2014

December Daily 2014

     I toy around with the December Daily every so many years. I love the concept of it. I am the family storyteller, so I get a little geeked out over this kind of stuff. With gearing up to do the annual album in 2015 Project Life style I'm trying to get back in the habit of writing and memory keeping.

     I've completed the project two or three times and I always enjoy going back and seeing what I might otherwise have forgotten in the whirlwind of activity, travel, etc that takes up December. December is also my reflect and plan for the new year month so I tend to get nostalgic. It's something one of the blog authors I follow, Ali Edwards, has done for several years and the scrapbooking community follows along in huge numbers.  Here's a link to her foundation pages for this year. The idea is to document the first 25 days of December and hopefully give some insight into your family traditions, fun experiences of the month, etc.

     I'd nearly given up the idea of doing this album this year. We aren't traveling or having guests until after Christmas. While we have decorations up, the big blowout gift opening really isn't happening as we are taking vacation. We have one side of the family Christmas already done and we've really cut back our gift giving to family over the years. It just seemed rather mundane to go to the trouble of recording the "same thing, different year". Our month is rather, normal, so why bother?

     Then I saw this post on Kerri Bradford's blog. What a great way to store, preserve, save, and keep organized all the happy mail we get during this month! Annnnndddd.....wherever binder rings are, an album will sprout. I realized then that I didn't have to do December DAILY, just December Whatever and add Christmas Cards.
     As I processed through the how of what method, sizing, etc I was going to use, I already had a lot of the stuff I needed. I decided to use some 6x8 digital templates and digital elements from Cathy Zielske  and some patterned paper that just so happened to coordinate. I decided to print the template pages I create at home, then add them to pattern paper backgrounds, and embellish as I wanted. (aka, hybrid scrapbooking) This way I can keep the album out for people to look at throughout the month. I like the immediate gratification of finishing a page, printing it, and having it in my hands right away on these smaller albums, whereas my annual album is exclusively digital and batch printed throughout the year either at Costco or www.persnicketyprints.com. Plus who the heck wants to deal with Costco anymore than necessary in December.
     As far as my focus and approach, I'm just kind of winging it and the Around Here theme Ali Edwards does sometimes kept coming to mind. In my annual album, especially if I get behind,  I use the concept of just jotting things down that are going on 'around here' to give a snapshot of life in a small space.  In this case I'm fleshing out the things going on around here a little more.
    Even though I have restarted the blog to kind of get back into the paper crafting, memory keeping circles, I don't plan to publicly share the album's pages beyond what I have in this post.

I found with my annual album it's so freeing of the mind and pen if you are just preserving life events for those who walk this life hand in hand with you, in person. 
     If you are inspired to do this type of project, click the links I provided, Google is your friend, and the #decemberdaily on Instagram will yield inspiration far more beautiful than I could ever create. ;-)

Monday, November 24, 2014

Raining diamonds


Today brought 72 degree temps, a strong breeze, bright sunshine and a crisp blue sky. As I stood drinking my coffee looking out the open screen door I was drawn to the patterns last night's rain left on the patio. It looked like mother nature had rained diamonds.... The contrast of shadow of the stair railing against the water pattern was just...pretty.
     It's hard to believe we are expecting significant snow in less than 48 hours. In the valley though, it could end up being nothing, which is just as well. We'll see.
 

Thursday, November 20, 2014

Best Gift Evah...


The kids in my family are getting older and it gets increasingly more challenging to select gifts that you know they'll like. Everyone is also spread out across several states and ease of packing and mailing often wins in the end. I subscribe to the K.I.S.S. method of the holiday season because it keeps me sane. Enter...the King. Cash. Would you like plastic or paper? (One of my nieces told me some time ago after receiving a Visa Gift Card; "Best gift EVAH!") Score.

I've done a number of things to present the gift cards or cash I gave in the past. Usually they just get placed in a card or bag with a small trinket, or just in a bag alone, then mailed or hand delivered, and that's that. Sometimes I actually do shop if I have a specific request. The last time I asked one of them for a gift suggestion via text, I was told 'I dunno...cash?' Score.

Yes it would be easier to just go to Walmart, grab a money holder card, get the cash back at the register and be done... (yep, 'easier', Walmart during the holiday season, uh huh, anyway..) But that wouldn't give me an excuse to stay in my jammies, crazy socks, oversized hoodie, drink coffee , put the dogs to work, and singing along to iTunes Radio all day.
The dogs are helping me today. 

Besides...we all got into this paper crafting hobby to save money, right? ;-) Greeting cards are expensive!!!!

Soooooo....in my quest to be more crafty and creative this year I decided to embark on a clever way to present 'the best gift ever'. 

And...in the interest of bringing the season of thanks into this Christmas focused post...I am thankful for......Google. The internet is meant for people like me. I really try NOT to be clever on my own. Very dangerous. Add wine and it can get downright messy. It's much easier to just copy (with credit!) someone else's cleverness. Google gave me several options, one of which I kept displayed on my MacBook Air for reference when I had time to put it together. It was from a blog post from 2009 (the credit for the cleverness) so I sure didn't want to have to dig for it again later. Sometimes that Google can be a teeny weeny bit inconsistent. 

Today I got ready to start the project since we are doing "Thanks-mas" with my side of the family, who are separated by I don't know, 12? hours, next week. I have a to do list a mile long so I wanted to get this done and have some peaceful creative time today. 

Since I'm over 40 now and according to the eye doc (who is maybe 17) I will need bifocals next time (uh, whatever!), I wanted to get that blog post onto my 21.5" iMac screen so I could see it across the room. Did you know that if you bring safari up on your iMac, things you've found on your other devices running safari magically show up? WHA???? How does it do THAT???? 

It's past lunch time, so here's the finished products. Happy pre-Thanksgiving grocery shopping. You know you WILL forget something right? No sense getting upset about it.